Unlock Your Audio Potential: A Comprehensive Guide to Audio Interfaces

An audio interface serves as the central hub for recording and processing audio on a computer, bridging the gap between musical instruments, microphones, and digital audio workstations (DAWs) with high-quality conversion and versatile connectivity.
Want to take your music production to the next level? A quality audio interface is the key. This guide will help you choose the perfect one for your needs, whether you’re a beginner or a seasoned pro.
What is an Audio Interface and Why Do You Need One?
An audio interface is the unsung hero of modern music production and audio recording. It’s a device that acts as a bridge between your instruments, microphones, and your computer, enabling you to capture high-quality audio directly into your digital audio workstation (DAW). But what exactly does it do, and why is it essential for anyone serious about audio?
Simply put, an audio interface converts analog signals (like the sound waves from your voice or guitar) into digital signals that your computer can understand and record. It also does the reverse, converting digital signals from your computer back into analog signals that you can hear through your speakers or headphones.
The Core Functions of Audio Interfaces
Audio interfaces are more than just simple converters. They offer a range of features that significantly enhance the quality and flexibility of your recordings:
- High-Quality Conversion: Audio interfaces use professional-grade analog-to-digital (A/D) and digital-to-analog (D/A) converters, which are far superior to the built-in sound cards in most computers. This results in cleaner, more accurate recordings and playback.
- Preamplifiers (Preamps): Many interfaces include mic preamps, which boost the low-level signals from microphones to a usable level for recording. Quality preamps add warmth, clarity, and detail to your vocal and instrument recordings.
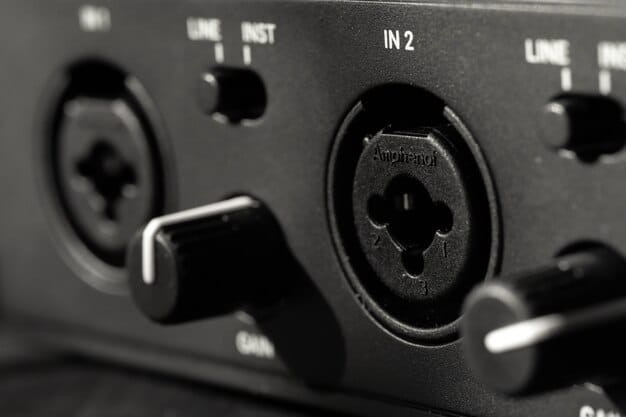
- Connectivity: Audio interfaces provide a variety of input and output options, including XLR inputs for microphones, 1/4-inch inputs for instruments, and balanced outputs for studio monitors. This allows you to connect all your gear in a streamlined and organized way.
Investing in an audio interface will dramatically improve the sound of your recordings and give you the flexibility to connect a wide range of equipment. It’s one of the most important investments you can make in your audio setup.
Key Features to Consider When Choosing an Audio Interface
Selecting the right audio interface can feel overwhelming, given the sheer number of options available. However, focusing on a few key features can help you narrow down your choices and find the perfect fit for your needs. Here’s a breakdown of the most important factors to consider:
When deciding on an interface, consider the importance of connectivity, bit depth and sample rate, preamps, and latency.
Number of Inputs and Outputs (I/O)
The number of inputs and outputs you need depends on the complexity of your recording setup. If you only plan to record one or two instruments or vocals at a time, an interface with two inputs may be sufficient. However, if you want to record a full band or drum kit, you’ll need an interface with more inputs.
- Two Inputs: Ideal for solo musicians, podcasters, or voice-over artists.
- Four to Eight Inputs: Suitable for small bands, home studios, and multi-instrumentalists.
- Eight or More Inputs: Necessary for recording full bands, drum kits, and complex audio setups.
Bit Depth and Sample Rate
Bit depth and sample rate determine the resolution and accuracy of your digital audio recordings. Higher bit depths and sample rates result in more detailed and dynamic recordings. Here’s a quick overview:
Bit depth and sample rate are two elements that determines audio file quality. The higher the bit depth and sample rate means more accurate and clear audio sound.
- Bit Depth: 24-bit is the industry standard and provides excellent dynamic range.
- Sample Rate: 44.1 kHz is standard for CD-quality audio, while 48 kHz is commonly used for video production. Higher sample rates like 96 kHz or 192 kHz can capture even more detail, but require more processing power and storage space.
Choosing the right audio interface involves carefully assessing your specific needs and ensuring that the interface meets your requirements in terms of I/O, conversion quality, preamps, and latency. By prioritizing these key features, you can make an informed decision and invest in an interface that will elevate your recordings.
Types of Audio Interfaces: USB, Thunderbolt, and More
Audio interfaces connect to your computer via various protocols, each with its own advantages and disadvantages. The most common types of audio interfaces are USB, Thunderbolt, and Ethernet (AVB). Understanding the differences between these connection types is crucial for choosing the right interface for your setup.
In other words, knowing what interface will work for one setup compared to another will either make or break a decision.
USB Audio Interfaces
USB is the most common and widely compatible connection type for audio interfaces. USB interfaces are easy to use, affordable, and work with virtually any computer. There are two main types of USB interfaces:
- USB 2.0: Offers sufficient bandwidth for most basic recording setups, with up to a few channels of audio.
- USB 3.0: Provides significantly more bandwidth than USB 2.0, allowing for higher channel counts and lower latency.
Thunderbolt Audio Interfaces
Thunderbolt is a high-speed connection protocol that offers significantly lower latency and higher bandwidth compared to USB. Thunderbolt interfaces are ideal for professional recording studios and musicians who demand the best possible performance.
It generally enables the professional recording environment for musicians to provide the best of the best.
- Low Latency: Thunderbolt interfaces offer near-zero latency, making them ideal for real-time monitoring and tracking.
- High Bandwidth: Thunderbolt can handle a large number of audio channels and high sample rates without any performance issues.
Ultimately, the choice between USB and Thunderbolt depends on your specific needs and budget. USB interfaces are a great option for most home studios and musicians on a budget, while Thunderbolt interfaces are the preferred choice for professionals who demand the best possible performance.
Setting Up Your Audio Interface for Optimal Performance
Once you’ve chosen the right audio interface, setting it up correctly is crucial for achieving optimal performance. Proper setup ensures low latency, stable operation, and high-quality audio recordings. Here’s a step-by-step guide to help you get started:
With the right setup, any audio interface can greatly enhance the user experience for the everyday musician.
Install the Drivers
The first step is to install the drivers for your audio interface. Drivers are software programs that allow your computer to communicate with the interface. Most manufacturers provide drivers on their website or on a CD included with the interface.
Without drivers, the interface will not be able to communicate correctly, causing errors or other issues.
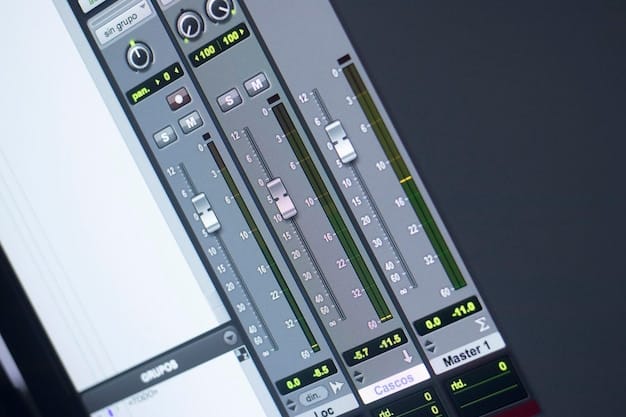
Configure Your DAW
Next, you need to configure your digital audio workstation (DAW) to use your audio interface. This typically involves selecting your interface as the audio input and output device in your DAW’s preferences or settings.
- Select the Interface: In your DAW’s audio settings, choose your audio interface as the primary input and output device.
- Adjust Buffer Size: Experiment with different buffer sizes to find the optimal balance between latency and performance. Start with a low buffer size for recording and increase it for mixing and mastering.
Properly configuring your audio interface and optimizing your system settings will ensure that you get the best possible performance from your recording setup. By following these steps, you can minimize latency, prevent dropouts, and capture high-quality audio recordings with ease.
Troubleshooting Common Audio Interface Issues
Even with the best equipment and careful setup, you may occasionally encounter issues with your audio interface. Troubleshooting these problems effectively can save you time and frustration. Here are some common issues and their solutions:
It is important to be able to identify and correct problems as they arise when using an audio interface.
Latency Problems
Latency is the delay between when you play an instrument or sing into a microphone and when you hear the sound in your headphones or speakers. High latency can make it difficult to record accurately and can be frustrating for musicians.
This makes recording or mixing in real-time a headache for the musician or producer.
- Lower Buffer Size: Reduce the buffer size in your DAW’s audio settings. A smaller buffer size reduces latency but requires more processing power.
- Direct Monitoring: Use the direct monitoring feature on your audio interface, if available. Direct monitoring allows you to hear the input signal directly from the interface, bypassing the computer and DAW, resulting in near-zero latency.
Driver Conflicts
Driver conflicts can occur when multiple audio devices or software programs are trying to use the same drivers. This can result in audio dropouts, crashes, or other unexpected behavior.
This sometimes causes interference with the equipment to make accurate recordings.
- Update Drivers: Make sure you have the latest drivers installed for your audio interface. Manufacturers often release new drivers to fix bugs, improve performance, and resolve compatibility issues.
- Reinstall Drivers: If updating doesn’t work, try uninstalling and reinstalling the drivers. Sometimes a clean installation can resolve conflicts and other issues.
By understanding these common issues and their solutions, you can quickly troubleshoot problems and get back to making music.
Maintaining and Upgrading Your Audio Interface
To ensure your audio interface continues to perform optimally, regular maintenance and timely upgrades are essential. Proper care can extend the lifespan of your interface and keep your recordings sounding their best. Here are some tips for maintaining and upgrading your audio interface:
When using an audio interface, it is important to maintain and care for it.
Regular Cleaning
Dust and dirt can accumulate on the connectors and controls of your audio interface, potentially causing connection issues and affecting performance. Clean your interface regularly with a soft, dry cloth to remove dust and debris.
Dust can get into the equipment internally to affect its processing functionality.
Keep Drivers Updated
Manufacturers frequently release driver updates to improve performance, fix bugs, and add new features. Regularly check for driver updates on the manufacturer’s website and install them as soon as they become available.
- Performance Improvements: New drivers often include optimizations that improve latency and overall performance.
- Bug Fixes: Driver updates can resolve compatibility issues and fix bugs that may be causing problems with your interface.
By following these maintenance tips and keeping an eye out for upgrade opportunities, you can ensure that your audio interface continues to deliver top-notch performance and meets the evolving needs of your recording setup.
| Key Point | Brief Description |
|---|---|
| 🎧 What is it? | Converts audio signals for computer use, enhancing recording quality. |
| 💡 Why Need One? | Improves sound quality, offers versatile connectivity, and reduces latency. |
| ⚙️ Key Features | Inputs/Outputs, bit depth, sample rate, preamps, and latency. |
| 💻 Types | USB, Thunderbolt, and Ethernet (AVB), each with distinct advantages. |
Frequently Asked Questions
▼
The primary function of an audio interface is to convert analog audio signals into digital signals that a computer can process, and vice versa. This allows you to record and playback high-quality audio using your computer.
▼
Audio interfaces offer superior audio quality due to their high-quality analog-to-digital (A/D) and digital-to-analog (D/A) converters. They also provide better preamps for microphones and more versatile connectivity options.
▼
Latency is the delay between when you input a sound and when you hear it. Audio interfaces reduce latency by providing faster processing and direct monitoring options, allowing for real-time recording and playback.
▼
The number of inputs and outputs depends on your recording needs. Solo musicians may only need two inputs, while bands or those recording drums will need more. Consider your current and future needs when choosing.
▼
USB interfaces are more common and affordable, while Thunderbolt interfaces offer lower latency and higher bandwidth. Thunderbolt is generally preferred for professional recording setups needing maximum performance.
Conclusion
Choosing the right audio interface is a cornerstone decision for anyone serious about audio production. By understanding the key features, connection types, and troubleshooting techniques, you can select an interface that not only meets your current needs but also supports your future creative endeavors. With the right interface, you’ll unlock the full potential of your recording setup and elevate the quality of your music.


